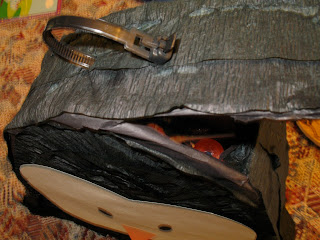
First, cut a penguin shape out of a corrugated cardboard box. The beauty of this is that you can make it large or small. This party is only going to have 6 kids, so mine was on the small side. I freehanded the drawing, cut it out, and then traced my cut out to make the other side of the piñata.
Next I cut the side of a cereal box and used it to make more strips of cereal box the same size (I also cut off the end tabs). You could make the strips wider to make your piñata thicker, but again, it was a small party, and I didn't feel like measuring.
One place I did make it sturdy was at the top where I was going to put the hanger. I cut an extra piece of cereal box and taped it to where the opening flap was hinged (where you put the candy in - don't forget to leave this opening!) and poked holes for the hanger on each side of the fold.
I glued tissue paper around the whole thing. This doesn't need to be beautiful; it just needs to hide any cardboard that might otherwise peek through the crepe paper.
I glued two strips of crepe paper all the way around the outside.
Next, I glued the crepe paper concentrically on the front and back. Just keep going around and around, mushing it into shape as you go.
I added features made from construction paper, and I drew the eyes on.
A wire tie is a good hanger, or you can twist some coat hanger wire into a loop. Looky at all the candy inside!!!
I glued the flap shut (Keep in mind that this was two days before the party, so the glue had time to firm up.) and then masking taped it, adding a strip of crepe paper to cover the seam. Done!


No comments:
Post a Comment